Managing Journal Entries
Creating a journal entry
After logging in to Cagamee and going to your book's page, go to the ledger account page under which you'd like to create a journal entry.
As you need to associate with the entry at least 2 ledger accounts, one for debit and another for credit, you can create the entry from either account's page. For example, when you want to create an entry for revenue with accounts receivable, you can either create an entry from the revenue account page or the accounts receivables page.
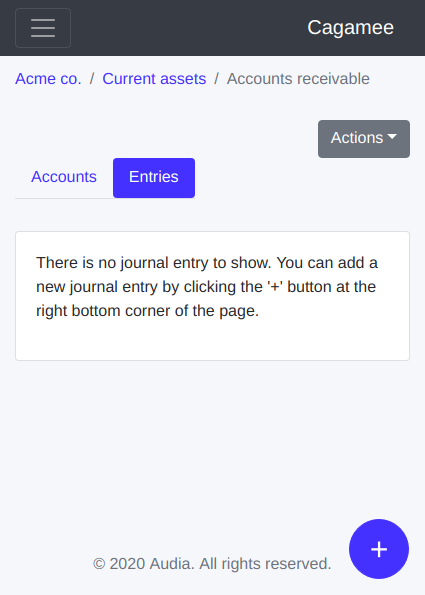
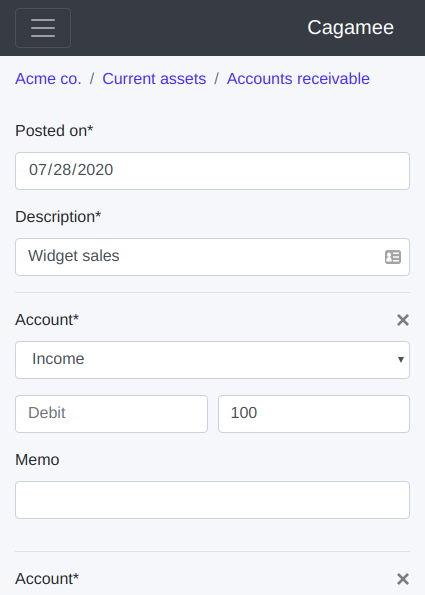
By clicking the 'Entries' tab and the '+' button at the bottom right corner of the page, the new entry form will appear.
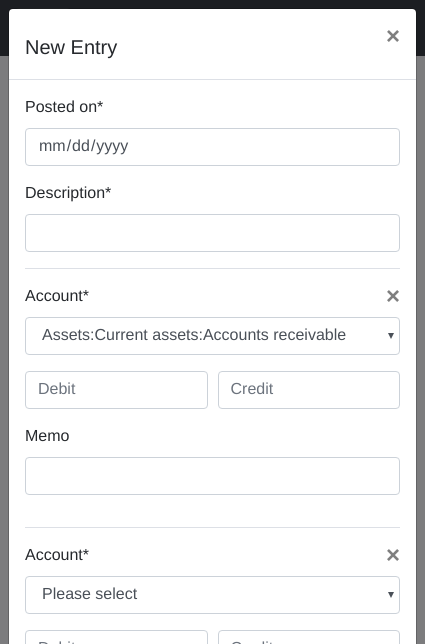
Enter the following fields. All the fields except ‘Posted on’ and ‘Description’ will appear multiple times so that you can associate multiple ledger accounts with the entry.
- Posted on: The date when the transaction occurred.
- Description: A brief description of the transaction.
- Account: The name of the ledger account to associate the entry. The first account is preselected with the name of the account page you're currently on. Select it manually for the second or subsequent accounts.
- Debit or Credit: Enter the monetary value to post to the ledger account above in either field. Make sure the sum of the debit fields and that of the credit fields balance out. If they’re not equal, you will receive an error message when trying to save the entry.
If there are only 2 accounts for the entry, the value you entered in the first account section's monetary field will automatically be copied to the opposite field of the 2nd account. For example, if you entered 100 in the debit field of the first account section, the credit field of the second account section will automatically be filled with 100. If there are more than 2 accounts for the entry, the value of the first account won’t be copied. - Memo (optional): You can skip it, or write a memo that's only related to a specific account as opposed to the whole entry.
An example use case would be social security deductions for a salary entry. If you only have one social security ledger account, but want to separate healthcare and pension amounts within an entry, you can use the social security account multiple times within a single entry and write ‘Healthcare’ and ‘Pension’ in the memo fields.
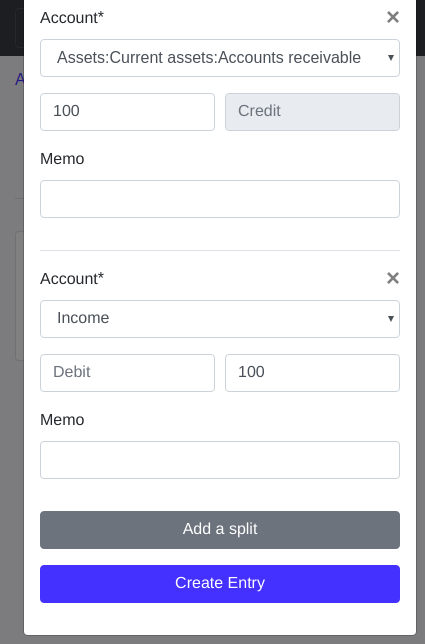
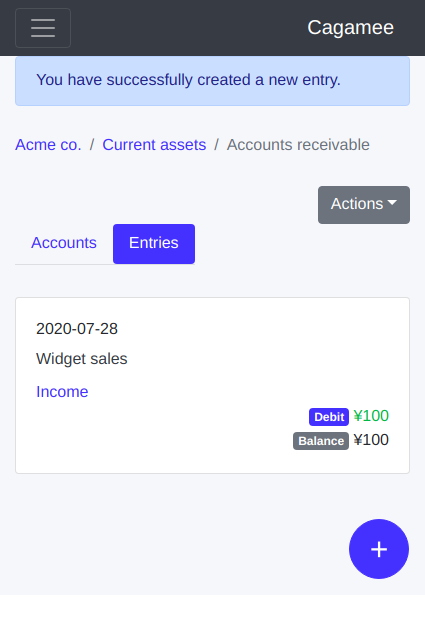
Click the 'Create Entry' button.
If all the required fields are correctly entered, you will see the entry created message.
Editing a journal entry
After logging in to Cagamee and going to your book's page, go to the ledger account page under which the entry is displayed.
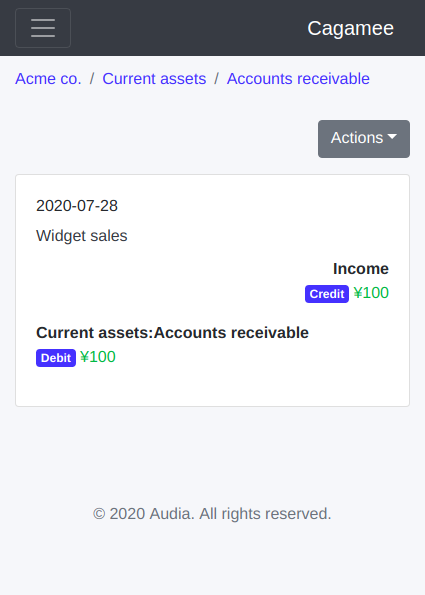
Navigate to the entry detail page by clicking the entry.
Navigate to the entry edit form by clicking the entry.
Edit the fields and click the 'Update Entry' button.
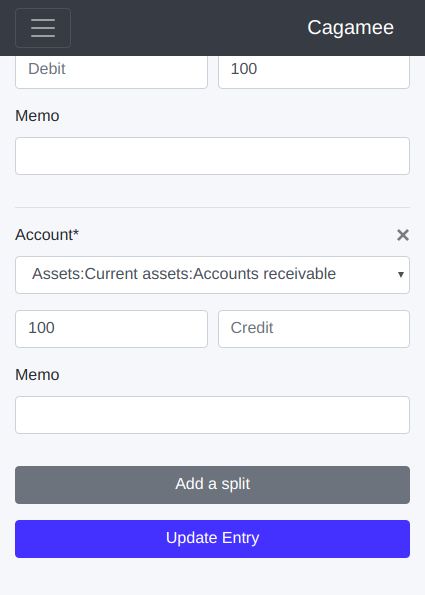
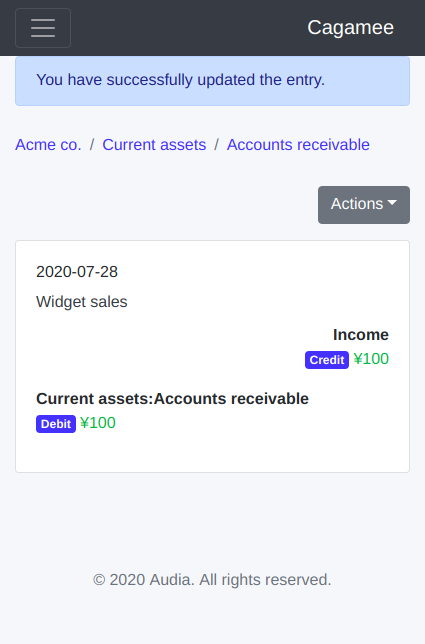
You'll see the entry updated message if all the required fields are correctly entered.
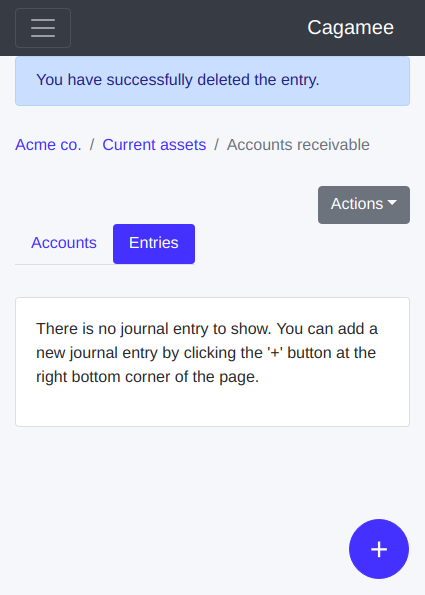
Deleting a journal entry
After logging in to Cagamee and going to your book's page, go to the ledger account page under which the entry is displayed.
Navigate to the entry detail page by clicking the entry.
Click the 'Actions' button on the right and select the 'Delete Entry' menu.
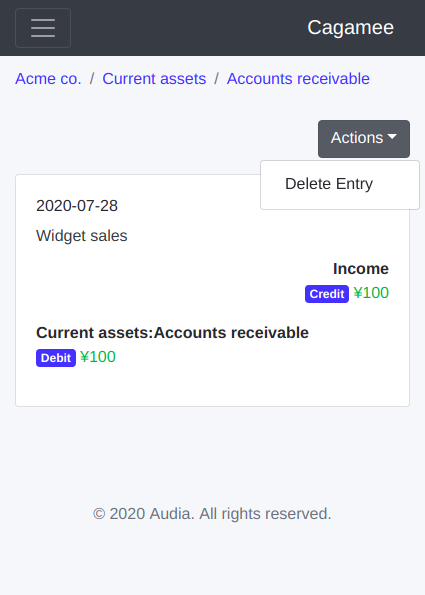
After the confirmation popup appears on the screen, select 'OK'.
You will see the message that your entry has been deleted.